Houghton International add value for customers with investment in 3D scanning and printing technology

In recent years there have been significant advances in Computer-Aided Design software along with 3D laser scanning and printing capabilities. Not only have these advances helped bring 3D technologies to a wider market, they have also resulted in improved reliability, accuracy and speed.
Now 3D scanners can produce models to within microns – one thousandth of a millimetre – collecting data from millions of points to produce a highly accurate digital file.
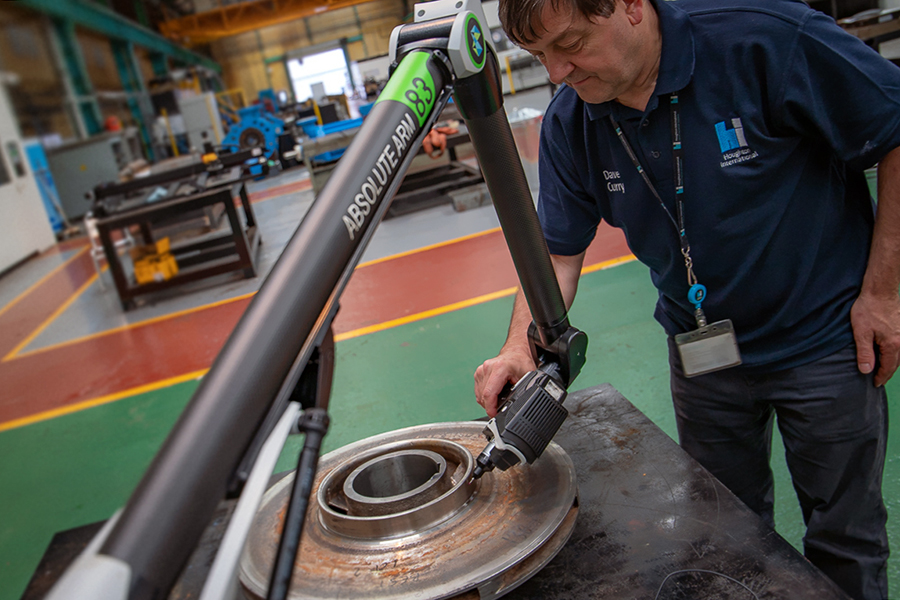
For example, the Hexagon Absolute Arm used by Houghton International has the capability to collect data down to just a few microns, which, for context, is smaller than a single red blood cell.
This level of resolution means it is simple to capture slight variations on complex surfaces within a relatively short time.
At Houghton International services can range from the overhaul of century-old equipment to cutting edge R&D projects, such as new product development for leading edge drive solutions.
For this wide range of operations the use of a 3D laser scanner enables rapid and accurate measurement and digitisation, freeing up valuable labour hours. 3D scanning technology can be utilised for the scanning of various component parts from motors, pumps and other electrical rotating machinery.
These parts often have complex geometry, the measurement of which can be time consuming and less accurate when using traditional methods.
Just one example of where this technology proves especially useful is in the measurement of pump volutes, which, due to their curvature, are difficult to measure accurately.
The irregular curve is difficult to accurately represent through more traditional measuring techniques. However, through a combination of laser and hard probes, Houghton International has the capability to capture accurate representations of complex three dimensional shapes, planes and curves, both internal and external.
This means equipment can be reverse engineered when no drawings or component details are available.
From here the product can be, for example, CNC machined or 3D printed in-house.
In addition it can be modified or reverse engineered using CAD software, enabling performance improvements and the manufacture of obsolete or long lead time parts.
This leads to savings in cost and time when manufacturing replacement parts and hence allows effective repairs to be performed more quickly.
This is advantageous as speed is often a key priority as machine downtime can be highly detrimental to a customer’s business performance.
In one instance, the Houghton International engineering team utilised a 3D scanner during the repair of a boiler feed pump that had been operating in a power station.
The engineers used the detailed scan of the split casing pump to produce a 3D model and accurately measure the worn ring bores, machined split faces and NDE bearing cap flange.
Engineering drawings were produced from the data so that a specification could be produced for weld repairs, machining the casings and manufacturing new components such as the missing NDE bearing cap.
The high level of accuracy of the repairs and manufactured components also increased the pump’s efficiency and cost and lead time were reduced by manufacturing components in-house.
A digital model can also be used for quality assurance purposes, enabling in-depth inspection prior to manufacture. 3D models can be inspected in minute detail and compared against original drawings and specifications or other CAD data.
Faults can be identified and examined and changes can be trialled before they are made to the actual machine.
Both digital models and physical prototypes are also used for customer communications.
For example, engineers may be identifying a fault on a pump or making changes for improved efficiency or reliability. An accurate, three dimensional model or a physical prototype of the pump can make it easier to visualise these.
If new components are to be manufactured, a scale model can be used to demonstrate before beginning full production.
One important strength of these technologies is that they can be integrated with other key CAD software. For example, in the process of High Voltage Coil manufacturing, data can be used in conjunction with Houghton International’s AutoCoil software to produce a highly accurate 3D coil shape or core mockup.
This can then be used to confidently determine fit and clearances before commencing with coil manufacture.
Hodi Mirafsari, Engineering Director at Houghton International, commented:
“3D scanners offer a combination of speed, accuracy and large fields of view.
“This makes the process of capturing data more efficient and offers flexibility into the quality control process. Combined with our 3D printing capabilities, these technologies are helping us to constantly add value for our customer base, reduce lead times and drive innovation.”
As 3D scanning and printing technology continues to develop and become increasingly integrated with existing CAD design capabilities, its role in electro mechanical engineering will only continue to grow.
Founded in 1984, Houghton International has expanded over the last 35 years into a multi-million-pound, multinational business.
The company has grown from originally serving one customer to now working with over 200 customers globally.
Get in touch with one of the Houghton International team if you are interested in finding out more about Houghton International’s CAD design and 3D scanning and printing capabilities.
External URL: https://www.houghton-international.com/
By Houghton International Electrical Services Ltd
875 Views
Recent Posts
- Heliex Power Saves Formaldehyde Producers £500k
- NEPIC spoke with member, Alpek Polyester UK Ltd to learn how they develop their workforce for the future and discover more about their mission to educate on PET
- FEG Global Designs Self-Powering Facility In Ghana
- Thorne & Derrick Electrifying Industry With 3M
- UK MP and chemical engineer Chris McDonald keen to unite the worlds of engineering and politics
Back to News >


